Install OS: Difference between revisions
Jump to navigation
Jump to search
| (62 intermediate revisions by the same user not shown) | |||
| Line 1: | Line 1: | ||
==Introduction== | |||
This page with all descriptions are tested with Debian and Ubuntu Linux. The below package selection has been recently tested with Debian Stretch. | |||
==Install== | ==Install== | ||
{| style="width: 60%;" | {| style="width: 60%;" | ||
|style="width:20%; vertical-align: top;"| | |style="width:20%; vertical-align: top;"| | ||
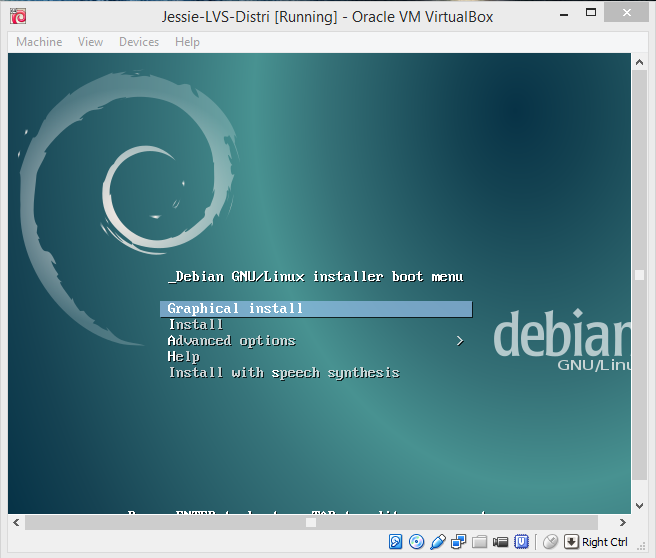
Sample for Debian 8: | Sample for Debian 8.1 (Jessie) netinst amd64:<br> | ||
* | The installation goes quick and easy, it can be <br> | ||
**Choose package ''' | done in less then 10 minutes for experienced users | ||
**Choose package ''' | *Choose Install | ||
**Software packages: | |||
***Choose package '''SSH server''' | |||
***Choose package '''Standard utilities''' | |||
|style="width:33%; vertical-align: top;"| | |style="width:33%; vertical-align: top;"| | ||
| Line 15: | Line 19: | ||
=Packages= | =Packages= | ||
On Debian always consider to update your repository first before you begin | |||
root@mylvs01:/# '''apt-get update''' | |||
==MySQL== | ==MySQL== | ||
apt-get install mysql-server | Note: On Debian Jessie the package is called mysql-server-5.5 while on Debian Stretch the package mysql-server is used. | ||
root@mylvs01:/# '''apt-get install mysql-server''' | |||
==Perl Core== | ==Perl Core== | ||
core modules | core modules | ||
apt-get install libnet-snmp-perl libxml-simple-perl libmail-sendmail-perl | root@mylvs01:/# '''apt-get install libnet-snmp-perl libxml-simple-perl libmail-sendmail-perl libnet-whois-raw-perl libsoap-lite-perl ''' | ||
for monitoring purposes: | for monitoring purposes: | ||
apt-get install nagios-plugins-standard | root@mylvs01:/# '''apt-get install nagios-plugins-standard nagios-nrpe-plugin''' | ||
other | other required packages | ||
root@mylvs01:/# '''apt-get install ipvsadm libdatetime-perl libnet-snmp-perl libxml-simple-perl libnet-ip-perl sudo nmap''' | |||
==Apache Perl CGI== | ==Apache Perl CGI== | ||
apt-get install libapache2-mod-fcgid libcgi-fast-perl | root@mylvs01:/# '''apt-get install apache2 libapache2-mod-fcgid libcgi-fast-perl''' | ||
apt-get install libcgi-pm-perl libcgi-session-perl | root@mylvs01:/# '''apt-get install libcgi-pm-perl libcgi-session-perl''' | ||
apt-get install libfcgi-perl libfcgi0ldbl | root@mylvs01:/# '''apt-get install libfcgi-perl libfcgi0ldbl''' | ||
===Enable CGI=== | ===Enable CGI=== | ||
a2enmod cgi | root@mylvs01:/# '''a2enmod cgi''' | ||
root@mylvs01:/# '''service apache2 restart''' | |||
=SUDO= | =SUDO= | ||
Edit sudo: | |||
root@mylvs01:/# '''visudo -f /etc/sudoers''' | |||
Add to sudo: | |||
www-data ALL=NOPASSWD: /sbin/ipvsadm | www-data ALL=NOPASSWD: /sbin/ipvsadm | ||
www-data ALL=NOPASSWD: /usr/bin/nmap | www-data ALL=NOPASSWD: /usr/bin/nmap | ||
| Line 60: | Line 65: | ||
www-data ALL=NOPASSWD: /var/www/mylvs/scripts/reboot.sh | www-data ALL=NOPASSWD: /var/www/mylvs/scripts/reboot.sh | ||
=Where to go next= | |||
<br> | |||
*Go here: [[Setup MyLVS]] | |||
= | |||
Latest revision as of 19:54, 25 July 2017
Introduction
This page with all descriptions are tested with Debian and Ubuntu Linux. The below package selection has been recently tested with Debian Stretch.
Install
Packages
On Debian always consider to update your repository first before you begin
root@mylvs01:/# apt-get update
MySQL
Note: On Debian Jessie the package is called mysql-server-5.5 while on Debian Stretch the package mysql-server is used.
root@mylvs01:/# apt-get install mysql-server
Perl Core
core modules
root@mylvs01:/# apt-get install libnet-snmp-perl libxml-simple-perl libmail-sendmail-perl libnet-whois-raw-perl libsoap-lite-perl
for monitoring purposes:
root@mylvs01:/# apt-get install nagios-plugins-standard nagios-nrpe-plugin
other required packages
root@mylvs01:/# apt-get install ipvsadm libdatetime-perl libnet-snmp-perl libxml-simple-perl libnet-ip-perl sudo nmap
Apache Perl CGI
root@mylvs01:/# apt-get install apache2 libapache2-mod-fcgid libcgi-fast-perl
root@mylvs01:/# apt-get install libcgi-pm-perl libcgi-session-perl
root@mylvs01:/# apt-get install libfcgi-perl libfcgi0ldbl
Enable CGI
root@mylvs01:/# a2enmod cgi
root@mylvs01:/# service apache2 restart
SUDO
Edit sudo:
root@mylvs01:/# visudo -f /etc/sudoers
Add to sudo:
www-data ALL=NOPASSWD: /sbin/ipvsadm
www-data ALL=NOPASSWD: /usr/bin/nmap
www-data ALL=NOPASSWD: /var/wwwl/mylvs/repl.sh
www-data ALL=NOPASSWD: /usr/local/nagios/libexec/check_nrpe
www-data ALL=NOPASSWD: /var/www/mylvs/scripts/mkbackup.sh
www-data ALL=NOPASSWD: /var/www/mylvs/scripts/mkbackupcomment.sh
www-data ALL=NOPASSWD: /usr/bin/mysqldump
www-data ALL=NOPASSWD: /usr/bin/mysql
www-data ALL=NOPASSWD: /bin/echo
www-data ALL=NOPASSWD: /var/www/mylvs/scripts/mkbackup.sh
www-data ALL=NOPASSWD: /var/www/mylvs/scripts/mkrestore.sh
www-data ALL=NOPASSWD: /var/www/mylvs/scripts/reboot.sh
Where to go next
- Go here: Setup MyLVS
