Setup windows test client: Difference between revisions
Jump to navigation
Jump to search
| (88 intermediate revisions by the same user not shown) | |||
| Line 1: | Line 1: | ||
Step by step installation and documentation for Windows (lots of | <br><br> | ||
*'''Goal: Adding a Windows test client to | <br> | ||
=Main= | |||
{| width="70%" <-- Test !--> | |||
| valign="top" | | |||
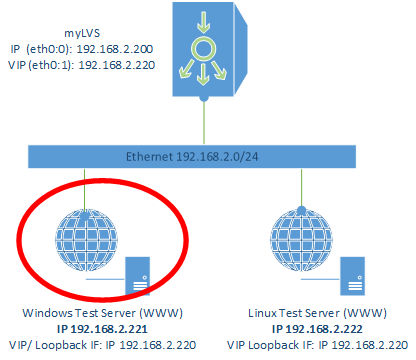
Step by step installation and documentation for Windows (lots of screen shots). | |||
*'''Goal: Adding a Windows test client to the myLVS environment''' | |||
'''Requirements''' | |||
*Windows Server 2012 (using your own license key) | *Windows Server 2012 (using your own license key) | ||
*IIS installed | *IIS installed | ||
| Line 6: | Line 12: | ||
*IP Address: 192.168.2.221 | *IP Address: 192.168.2.221 | ||
*Loopback IP Address: 192.168.2.220 | *Loopback IP Address: 192.168.2.220 | ||
| valign="top" | | |||
Windows Setup in myLVS overview<br> | |||
[[File:myLVS-HL-Windows.png|240px]]<br><br> | |||
|} | |||
<br> | <br> | ||
=Add a new loop back device= | |||
{| width="50%" | |||
| valign="top" | | |||
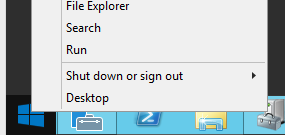
Click on '''Run''' <br> <br> | |||
[[File:03-01-01-Run.png|240px]]<br><br> | [[File:03-01-01-Run.png|240px]]<br><br> | ||
| valign="top" | | |||
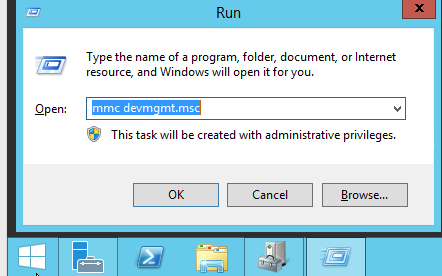
Enter '''mmc devmgmt.msc'''<br> | Enter '''mmc devmgmt.msc''' to open <br>the '''Device Manager'''<br> | ||
[[File:03-01-02-DevMgr.png|240px]]<br><br> | [[File:03-01-02-DevMgr.png|240px]]<br><br> | ||
|} | |||
Right mouse click on your computer, select '''Add legacy hardware'''<br> | {| width="50%" | ||
| valign="top" | | |||
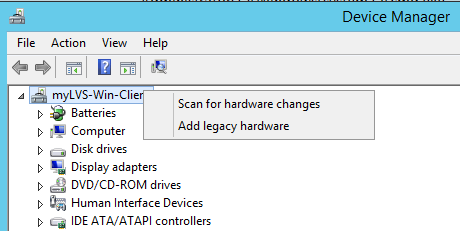
Right mouse click on your computer, <br> | |||
select '''Add legacy hardware'''<br> | |||
[[File:03-01-03-AddHW.png|240px]]<br><br> | [[File:03-01-03-AddHW.png|240px]]<br><br> | ||
| valign="top" | | |||
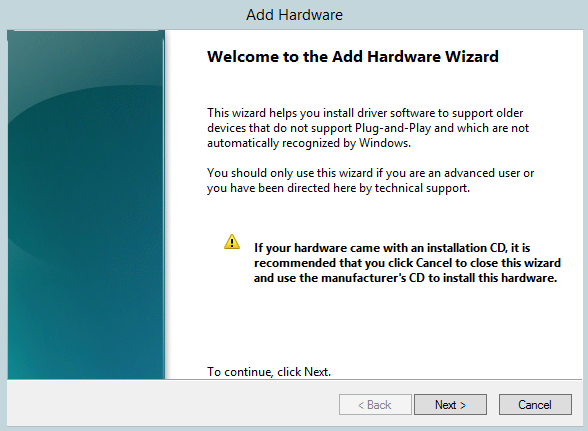
Confirm<br> | Confirm<br> | ||
[[File:03-01-04-AddHWWizzard.png|240px]]<br><br> | [[File:03-01-04-AddHWWizzard.png|240px]]<br><br> | ||
|} | |||
{| width="50%" | |||
| valign="top" | | |||
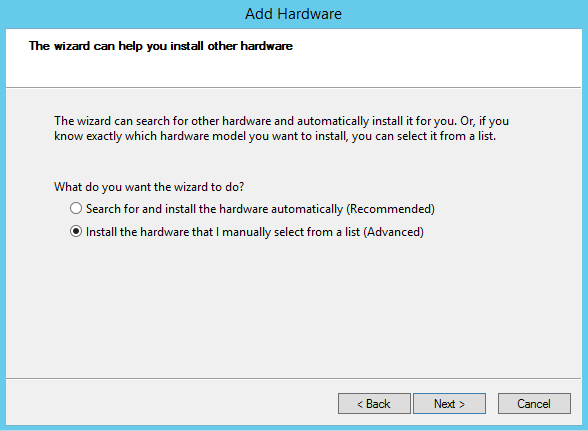
Select the '''advanced option'''<br> | Select the '''advanced option'''<br> | ||
[[File:03-01-05-AddHWManual.png|240px]]<br><br> | [[File:03-01-05-AddHWManual.png|240px]]<br><br> | ||
| valign="top" | | |||
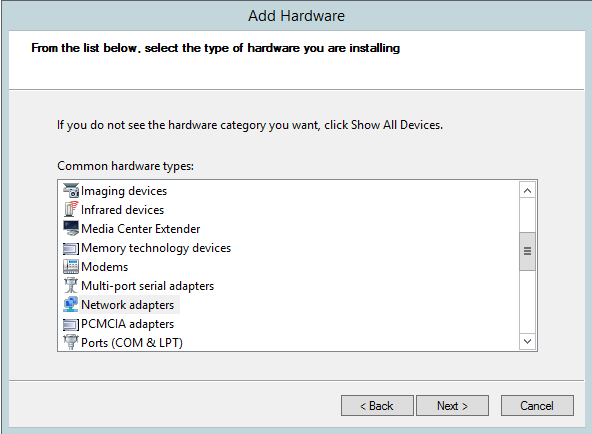
Select '''Network adapters'''<br> | Select '''Network adapters'''<br> | ||
[[File:03-01-06-AddHWNIC.png|240px]]<br><br> | [[File:03-01-06-AddHWNIC.png|240px]]<br><br> | ||
|} | |||
Select '''Microsoft''' | {| width="50%" | ||
| valign="top" | | |||
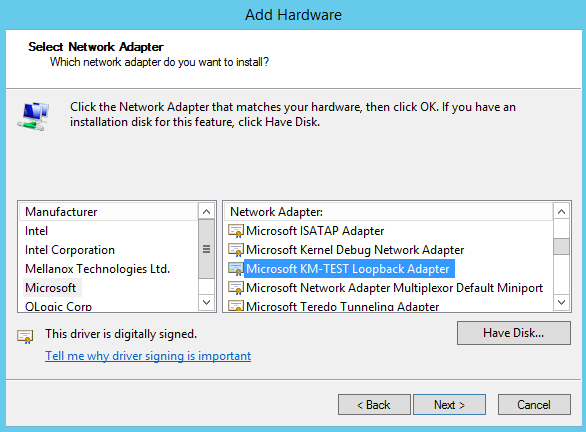
*Select '''Microsoft''' <br> | |||
*Select '''Microsoft KM-Test'''<br> | |||
[[File:03-01-07-AddHWTestLoopback.png|240px]]<br><br> | [[File:03-01-07-AddHWTestLoopback.png|240px]]<br><br> | ||
| valign="top" | | |||
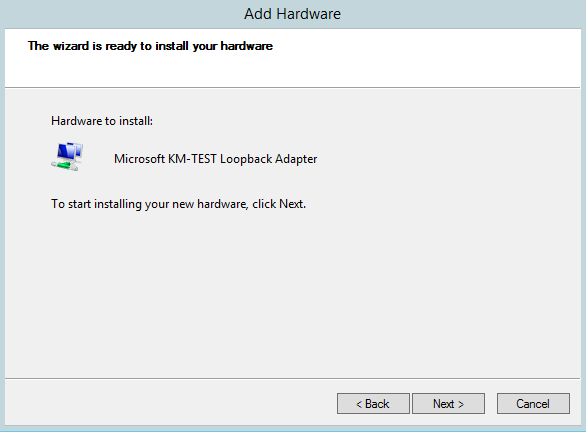
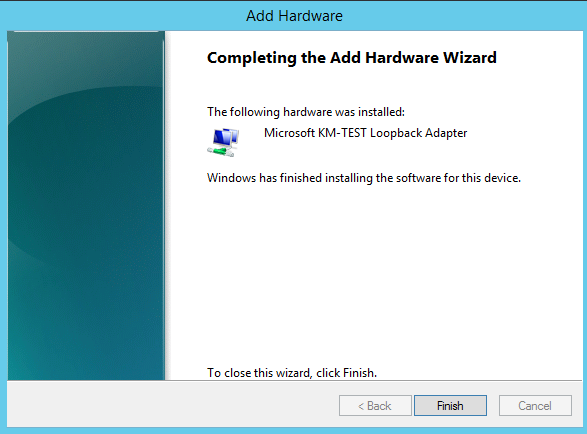
Confirm<br> <br> | |||
Confirm<br> | |||
[[File:03-01-08-AddHWConfirm.png|240px]]<br><br> | [[File:03-01-08-AddHWConfirm.png|240px]]<br><br> | ||
|} | |||
| Line 43: | Line 63: | ||
=Configure the new loop back device= | =Configure the new loop back device= | ||
Within Windows, goto the '''Network connections''', | Within Windows, goto the '''Network connections''', with Server 2012 you can '''run''' and type '''ncpa.ctl''' | ||
with Server 2012 you can '''run''' and type '''ncpa.ctl''' | |||
Rename | |||
{| width="60%" | |||
| valign="top" | | |||
Rename the loopback adapter to '''loopback''', <br> | |||
Rename the ethernet adapter to '''lan'''<br> | |||
[[File:03-01-10-AddHWLoopback.png|320px]]<br><br> | [[File:03-01-10-AddHWLoopback.png|320px]]<br><br> | ||
| valign="top" | | |||
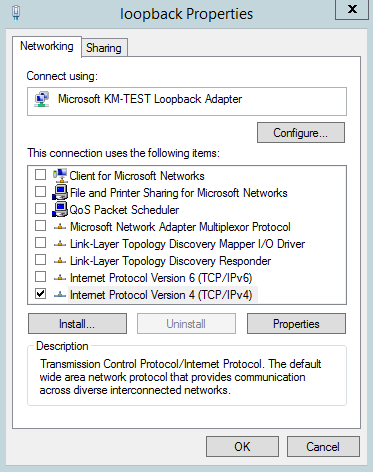
Edit the properties of '''IPv4''' of the loopback adapter<br> <br> | |||
[[File:03-01-11-LoopbackPropertie.png|320px]]<br><br> | |||
|} | |||
Enter the VIP (Virtual IP) = '''192.168.2.220/24''', click '''Advanced'''<br> | {| width="60%" | ||
| valign="top" | | |||
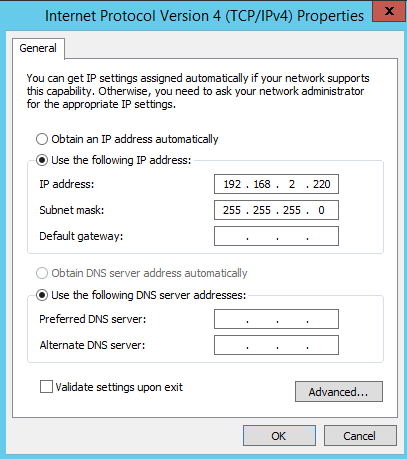
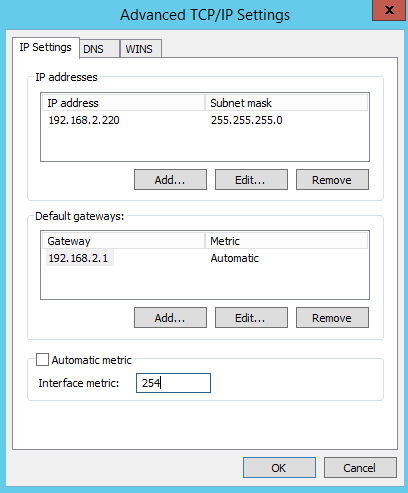
Enter the VIP (Virtual IP) = '''192.168.2.220/24''', <br>click '''Advanced'''<br> <br> | |||
[[File:03-01-12-LoopbackIP.png|320px]]<br><br> | [[File:03-01-12-LoopbackIP.png|320px]]<br><br> | ||
| valign="top" | | |||
Disable '''Automatic metric''', <br>make the adapter aware of the '''ARP''' issue<br> | |||
Enter a high byte number, like 254, click OK<br> | |||
[[File:03-01-13-LoopbackMetric.png|320px]]<br><br> | |||
|} | |||
Open an administrative console and enter: | Open an administrative console and enter: | ||
| Line 70: | Line 101: | ||
=Testing the new loop back device= | =Testing the new loop back device= | ||
{| width="70%" | |||
| valign="top" | | |||
From the Windows host try to open the URL<br> | From the Windows host try to open the URL<br> | ||
*http://192.168.2.220 | *http://192.168.2.220 | ||
| Line 75: | Line 108: | ||
From an Network client try to open the URL<br> | From an Network client try to open the URL<br> | ||
*http://192.168.2.221 | *http://192.168.2.221 | ||
| valign="top" | | |||
The result should be the default IIS Webpage<br> | The result should be the default IIS Webpage<br> | ||
[[File:03-01-IISDefault.png|320px]]<br><br> | [[File:03-01-IISDefault.png|320px]]<br><br> | ||
|} | |||
{| width="50%" | |||
| valign="top" | | |||
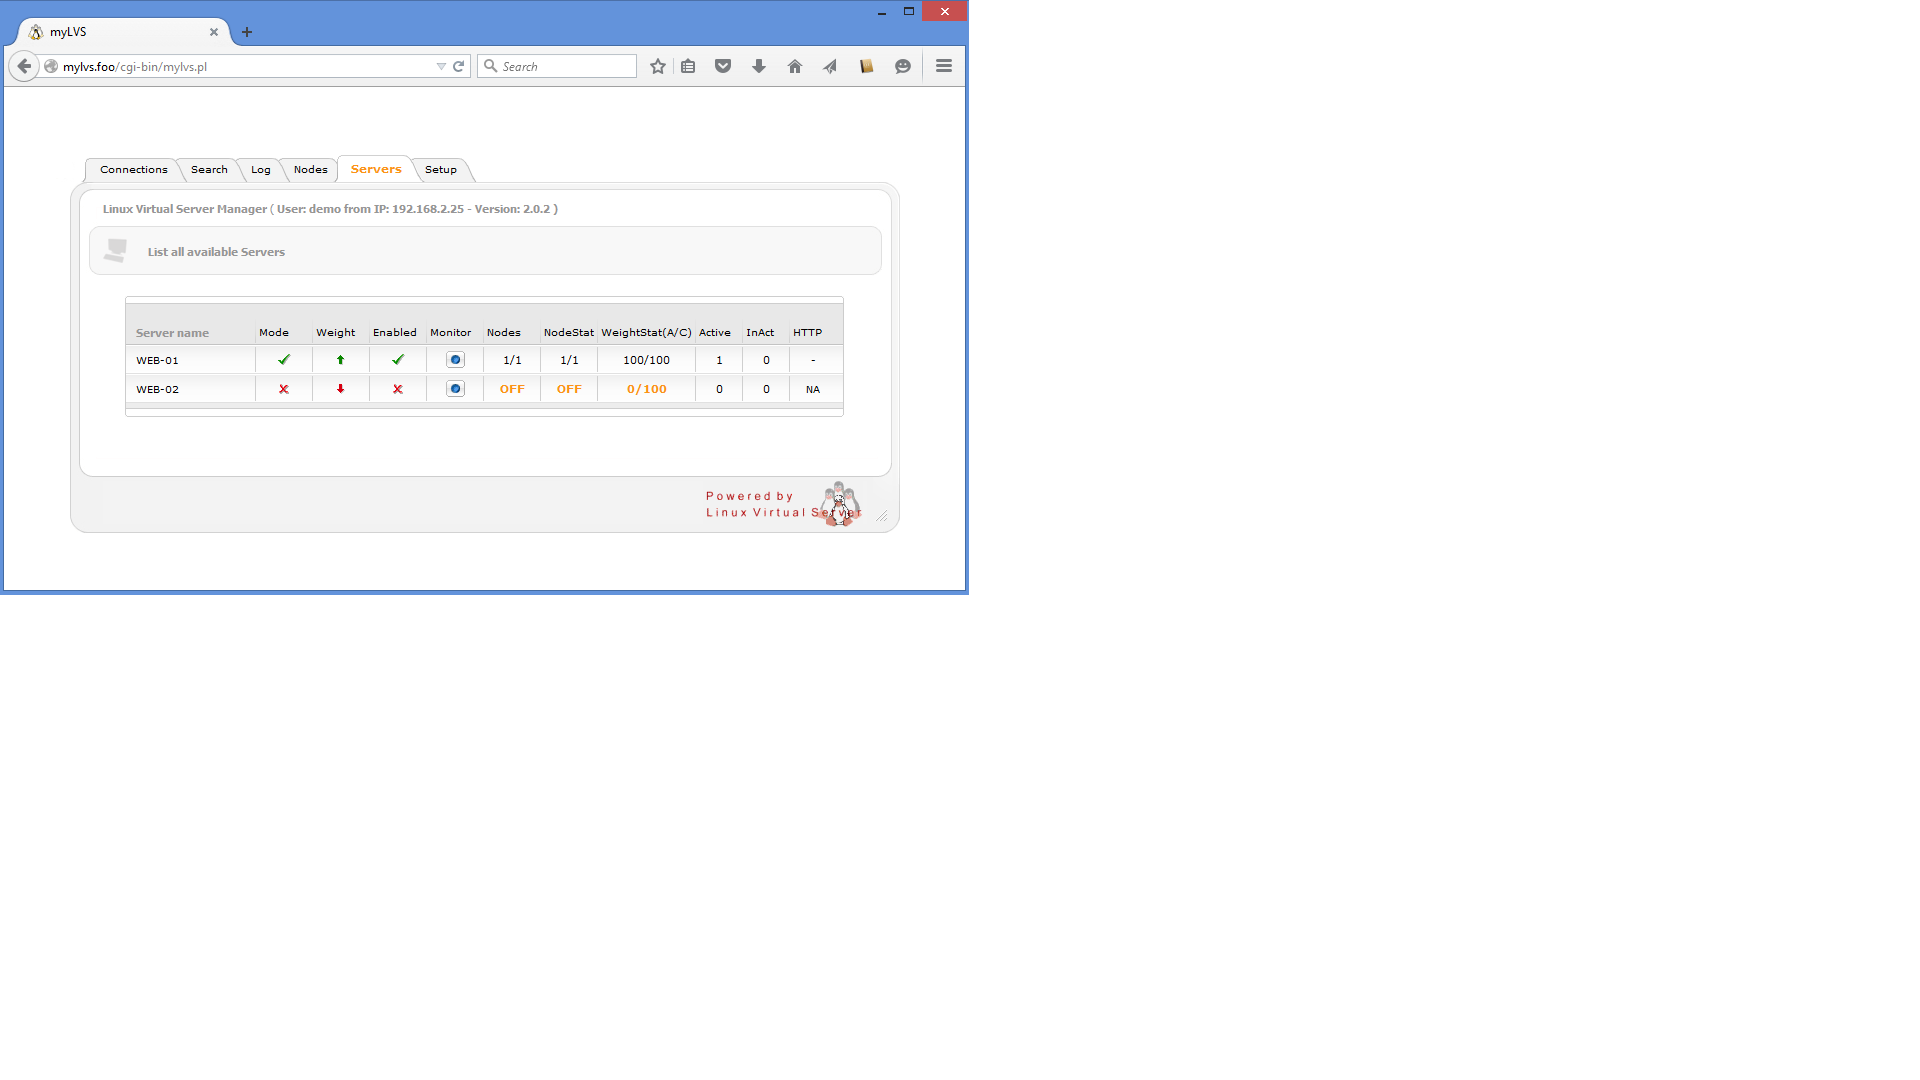
Goto myLVS and enable the Windows host and <br> | |||
[[File:03-02-01-ServerView.png|320px]]<br><br> | |||
| valign="top" | | |||
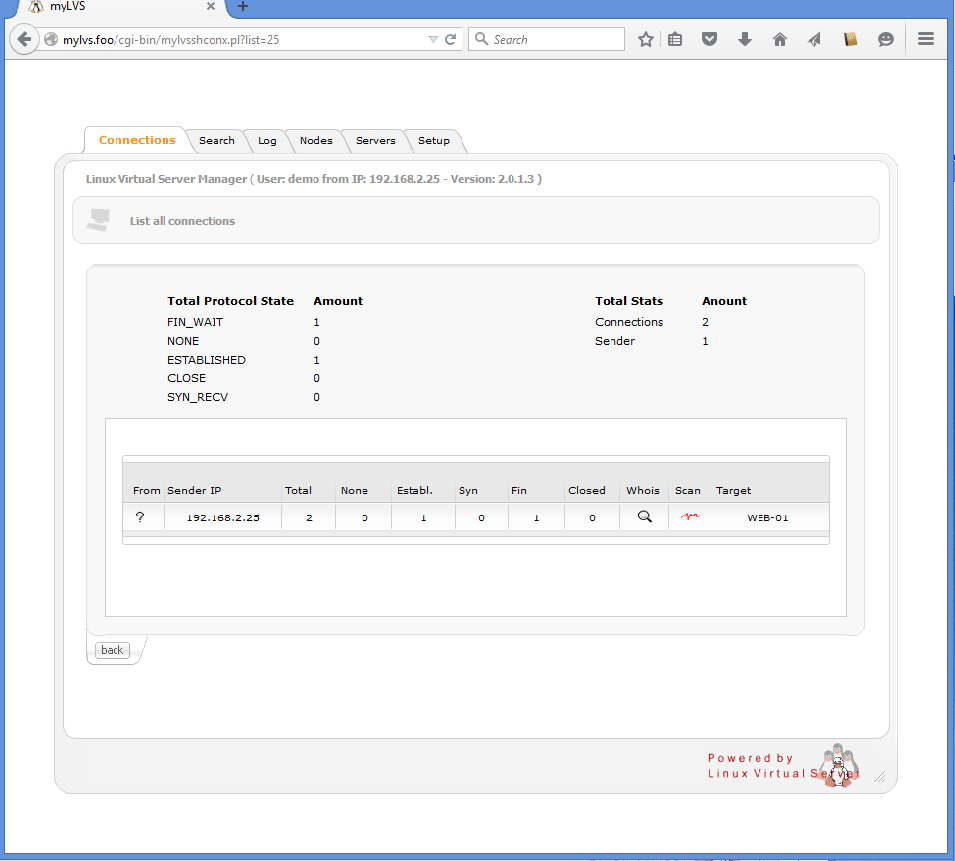
see the connection list:<br> | |||
[[File:03-02-02-NodeConnections.png|320px]]<br><br> | |||
|} | |||
=Where to go next= | |||
[[ | <br> | ||
*Go here: [[Setup linux test client]] | |||
Latest revision as of 18:32, 2 September 2015
Main
|
Step by step installation and documentation for Windows (lots of screen shots).
Requirements
|
Add a new loop back device
|
Right mouse click on your computer, |
|
Configure the new loop back device
Within Windows, goto the Network connections, with Server 2012 you can run and type ncpa.ctl
|
Rename the loopback adapter to loopback, |
|
Enter the VIP (Virtual IP) = 192.168.2.220/24, |
Disable Automatic metric, |
Open an administrative console and enter:
netsh interface ipv4 set interface "lan" weakhostreceive=enabled
netsh interface ipv4 set interface "loopback" weakhostreceive=enabled
netsh interface ipv4 set interface "loopback" weakhostsend=enabled
See this for more information about those commands:
Testing the new loop back device
|
From the Windows host try to open the URL From an Network client try to open the URL |
Where to go next
- Go here: Setup linux test client
