Setup MyLVS: Difference between revisions
| Line 2: | Line 2: | ||
At the very step we need to setup the database with all the required tables, please use the import script '''mylvs.sql''' to do so. <br> | At the very step we need to setup the database with all the required tables, please use the import script '''mylvs.sql''' to do so. <br> | ||
You will find the script within the archive or on your disk in: '''/var/www/mylvs/templates/mysql_data/mylvs.sql'''<br> | You will find the script within the archive or on your disk in: '''/var/www/mylvs/templates/mysql_data/mylvs.sql'''<br> | ||
mysql -u root -p < lvs.sql | mysql -u root -p < lvs.sql | ||
Revision as of 17:44, 27 August 2015
Setup mySQL
At the very step we need to setup the database with all the required tables, please use the import script mylvs.sql to do so.
You will find the script within the archive or on your disk in: /var/www/mylvs/templates/mysql_data/mylvs.sql
mysql -u root -p < lvs.sql
Setup Apache
Get and copy the Apache template to:
/etc/apache2/sites-enabled/mylvs.conf
Verify the configuration and enable it with a2ensite:
a2ensite mylvs.conf
Add an demo account to apache, this will be the login through the browser:
root@mylvs01:/# htpasswd -c /var/www/mylvs/wwwroot/.htpasswd.users demo
Login to myLVS
Depending on your client OS you may add a hostheader to your host file, to do this type
- Linux
# vi /etc/hosts
- Windows (Administrator command shell)
notepad c:\Windows\System32\drivers\etc\hosts
Add:
192.168.x.y mylvs.foo
- Note: The Windows DNS Cache requires a reload:
ipconfig/flushdns
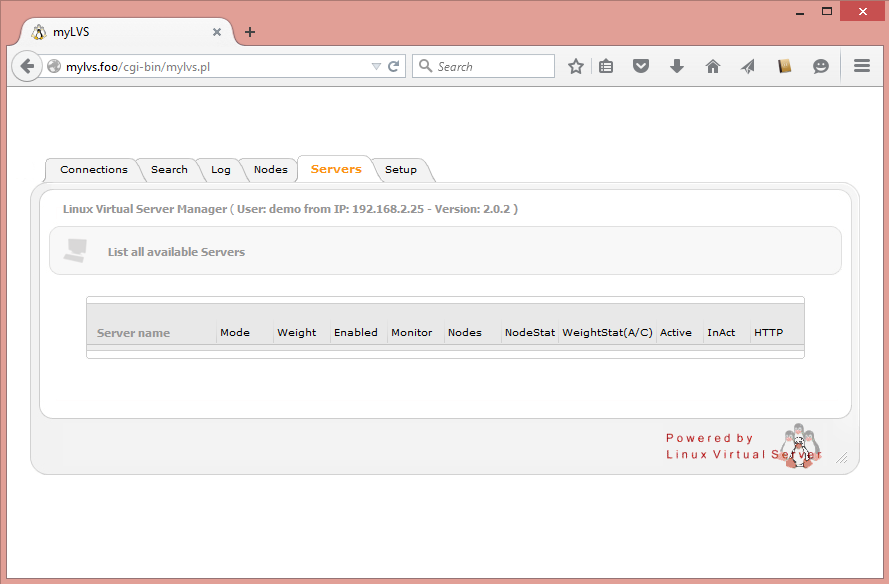
Navigate your prefered browdsr to mylvs.foo, login using demo, demo.
You should see an empty configuration scren.

Automatic load of myLVS setting
To automatic load the myLVS configuration it is requires to setup sysmctl which comes new with Debian 8.
This configuration will start on boot only using the type oneshot, it is very important to load this after mysql.service
Create File: /etc/systemd/system/mylvs-init.service
Add:
[Unit]
Description=myLVS Startup Script
After=network.target auditd.service mysql.service

[Service]
Type=oneshot
ExecStart=/usr/bin/perl /var/www/mylvs/mylvsinit.pl -a

[Install]
WantedBy=multi-user.target
- First status
root@mylvs01:/systemctl status mylvs-init.service
mylvs-init.service - myLVS Startup Script
 Loaded: loaded (/etc/systemd/system/mylvs-init.service; disabled)
 Active: inactive (dead)
- Enable: systemctl enable mylvs-init.service
Output:
Created symlink from /etc/systemd/system/multi-user.target.wants/mylvs-init.service to /etc/systemd/system/mylvs-init.service.
- Reload (optional): systemctl daemon-reload
- Reboot to test
- Live Status
root@mylvs01:/home/demo# systemctl status mylvs-init.service
mylvs-init.service - myLVS Startup Script
  Loaded: loaded (/etc/systemd/system/mylvs-init.service; enabled)
  Active: inactive (dead) since Mon 2015-08-17 14:53:48 EDT; 1min 38s ago
 Process: 933 ExecStart=/usr/bin/perl /var/www/mylvs/mylvsinit.pl -a (code=exited, status=0/SUCCESS)
Main PID: 933 (code=exited, status=0/SUCCESS)
Automatic load of myLVS Monitor setting
Create File: /etc/systemd/system/mylvsmon.service
Add:
[Unit]
Description=myLVS Monitor
After=network.target auditd.service mysql.service

[Service]
ExecStart=/var/www/mylvs/mylvsmon.pl
ExecStop=/usr//bin/killall -9 mylvsmon.pl
KillMode=process
RemainAfterExit=yes

[Install]
WantedBy=multi-user.target
Note: The above has been tested on Debian 8/9
To manage use:
- Enable: systemctl enable mylvs-init.service
- Reload (optional): systemctl daemon-reload